


Windows Server 2012 R2 Setup and Installation Tutorial
Windows Server 2012 R2 is a powerful server operating system developed by Microsoft for businesses of all sizes. It introduced significant improvements over its predecessor, including enhanced virtualization, better storage management, improved security, and expanded cloud integration. Although newer versions of Windows Server are now available, many organizations still use Windows Server 2012 R2 to support legacy applications and infrastructure.
Whether you are setting up a test lab, maintaining an existing environment, or learning Windows Server administration, understanding the installation process is an essential first step. This comprehensive guide walks you through installing Windows Server 2012 R2, configuring the initial settings, and applying best practices to ensure a stable deployment.
What Is Windows Server 2012 R2?
Windows Server 2012 R2 is the successor to Windows Server 2012 and was released in October 2013. It offers a robust platform for hosting applications, managing networks, running virtual machines, and providing centralized services such as Active Directory and file sharing.
Key features include:
- Hyper-V virtualization enhancements
- Improved Storage Spaces
- Work Folders
- Dynamic Access Control
- IIS 8.5
- Enhanced PowerShell support
- Improved Remote Desktop Services
- Better cloud integration with Microsoft Azure
These features made Windows Server 2012 R2 a popular choice for enterprise and small business environments.
System Requirements
Before beginning the installation, ensure your hardware meets the minimum requirements.
Typical requirements include:
- 64-bit processor running at 1.4 GHz or faster
- Minimum 512 MB of RAM (2 GB or more recommended)
- At least 32 GB of available storage
- Gigabit Ethernet network adapter
- DVD drive or bootable USB installation media
For production environments, significantly higher specifications are recommended to accommodate server workloads and future growth.
Prepare for Installation
Proper preparation helps prevent installation problems.
Before installing Windows Server 2012 R2:
- Back up any important data.
- Verify hardware compatibility.
- Download storage, RAID, and network drivers if required.
- Obtain a valid Windows Server product key.
- Prepare a bootable USB drive or DVD containing the installation files.
If the server will join an existing domain, gather network information such as IP addresses, DNS settings, and domain credentials.
Configure BIOS or UEFI Settings
Restart the server and enter the BIOS or UEFI firmware.
Check the following settings:
- Set the correct system date and time.
- Configure the boot order to prioritize the USB drive or DVD.
- Enable hardware virtualization if Hyper-V will be used.
- Configure RAID if multiple storage drives are installed.
Save the configuration and restart the server.
Boot from the Installation Media
Insert the Windows Server 2012 R2 installation media and boot the computer.
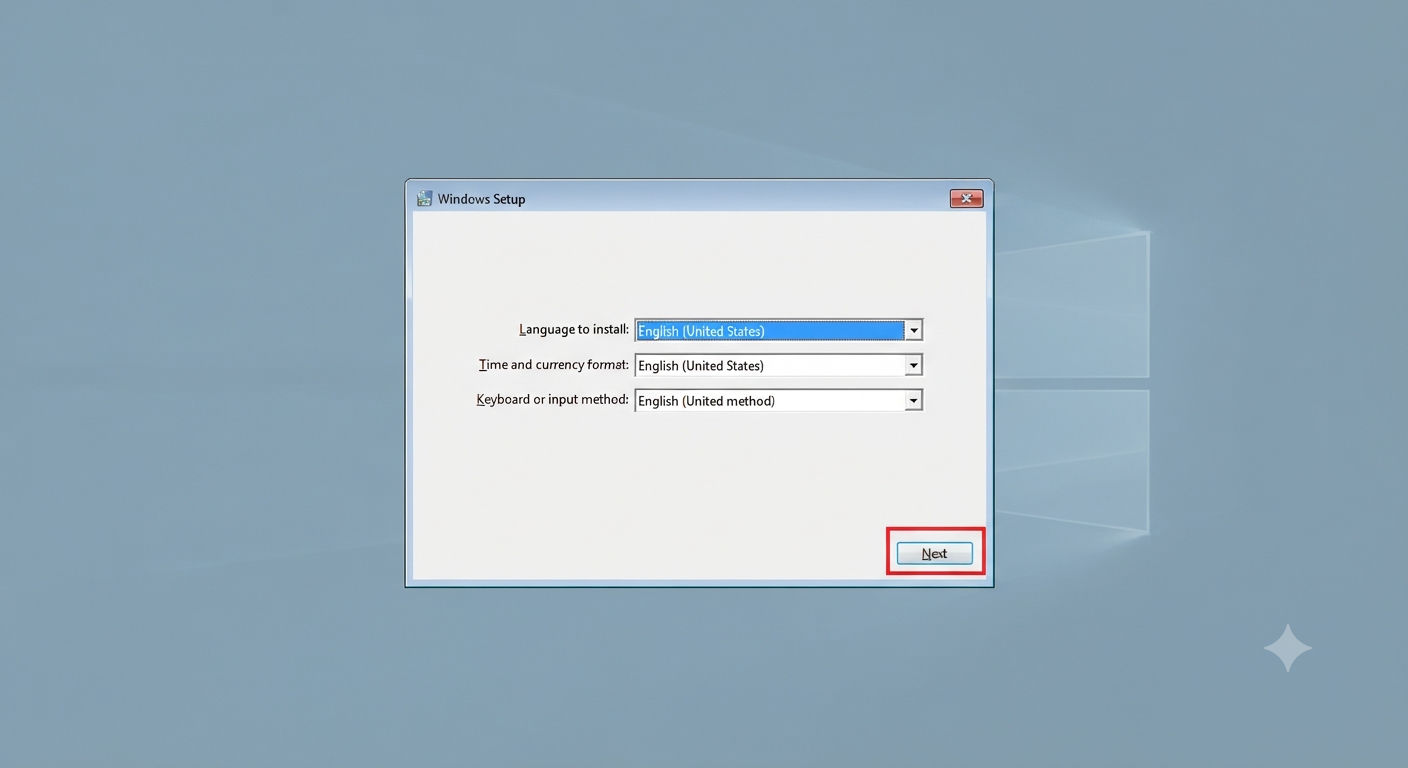
The Windows Setup screen will appear.
Select:
- Language to install
- Time and currency format
- Keyboard or input method
Click Next, then select Install now.
Image: Windows Server 2012 R2 Setup screen.
Enter the Product Key
If prompted, enter your Windows Server product key.
Some installation media may skip this step if the product key is embedded or provided later.
Click Next to continue.
Choose the Windows Server Edition
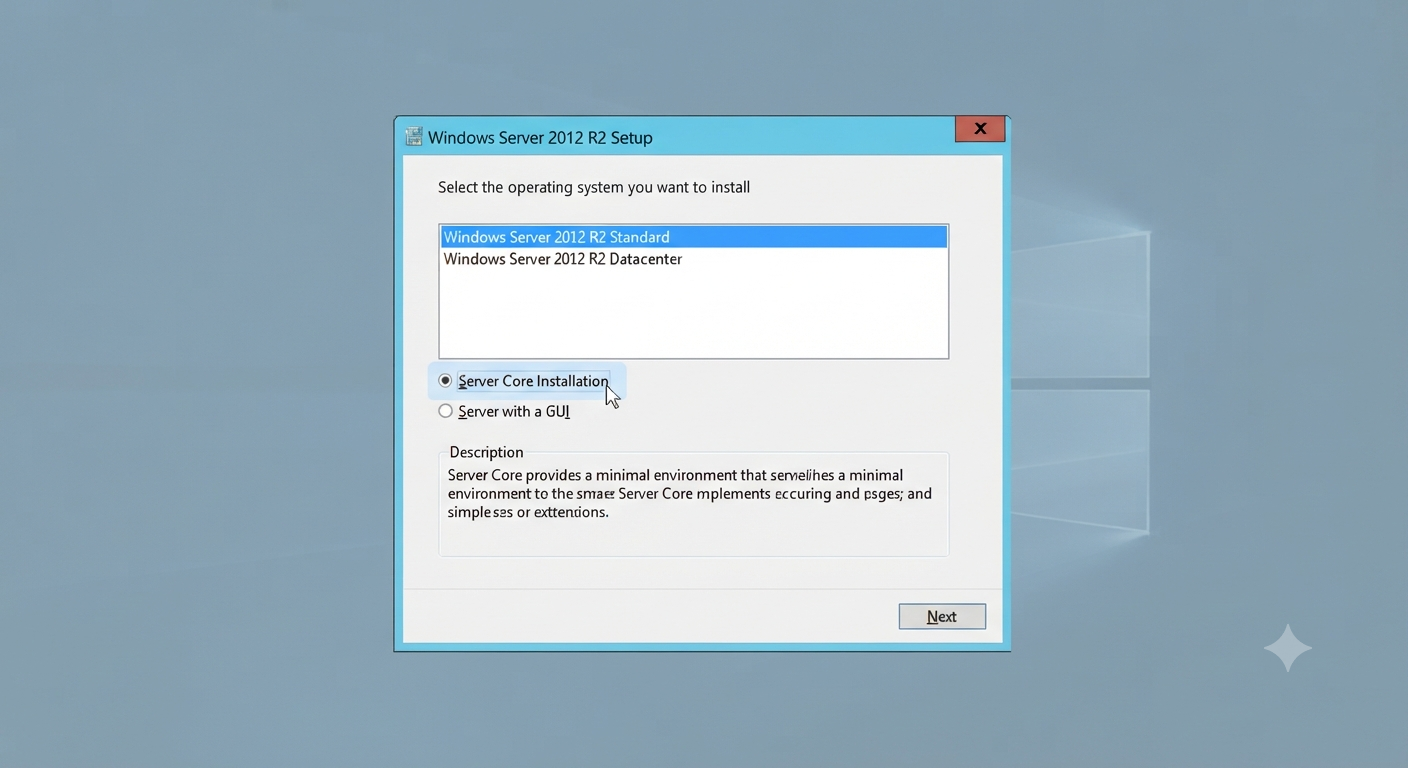
Depending on your license, you may see options such as:
- Windows Server 2012 R2 Standard
- Windows Server 2012 R2 Datacenter
You may also choose between:
- Server Core Installation
- Server with a GUI
Server Core
Server Core installs a minimal interface that reduces the attack surface and lowers maintenance requirements.
Advantages include:
- Improved security
- Lower resource consumption
- Fewer updates
Server with a GUI
The graphical interface is easier for beginners and administrators who prefer traditional Windows management tools.
It includes:
- Desktop
- File Explorer
- Server Manager
- Microsoft Management Console (MMC)
For learning and general administration, the GUI installation is often the most practical choice.
Accept the License Agreement
Read and accept Microsoft’s license terms.
Click Next to continue.
Select the Installation Type
You will be asked to choose between:
- Upgrade
- Custom Installation
Choose Custom: Install Windows only (advanced) for a clean installation.
Create and Format Partitions
Select the destination drive.
You can:
- Create new partitions
- Delete existing partitions
- Format partitions
- Extend storage volumes
For new installations, Windows automatically creates the required system partitions.
Click Next to begin copying installation files.
Allow Windows to Install
The installation process includes:
- Copying files
- Installing features
- Installing updates
- Restarting the server several times
The process usually takes between 15 and 45 minutes depending on hardware performance.
Avoid interrupting the installation.
Configure the Administrator Password
After installation finishes, Windows prompts you to create the Administrator password.
Choose a password that:
- Meets complexity requirements
- Contains uppercase and lowercase letters
- Includes numbers
- Includes special characters
Store the password securely.
Log In to Windows Server
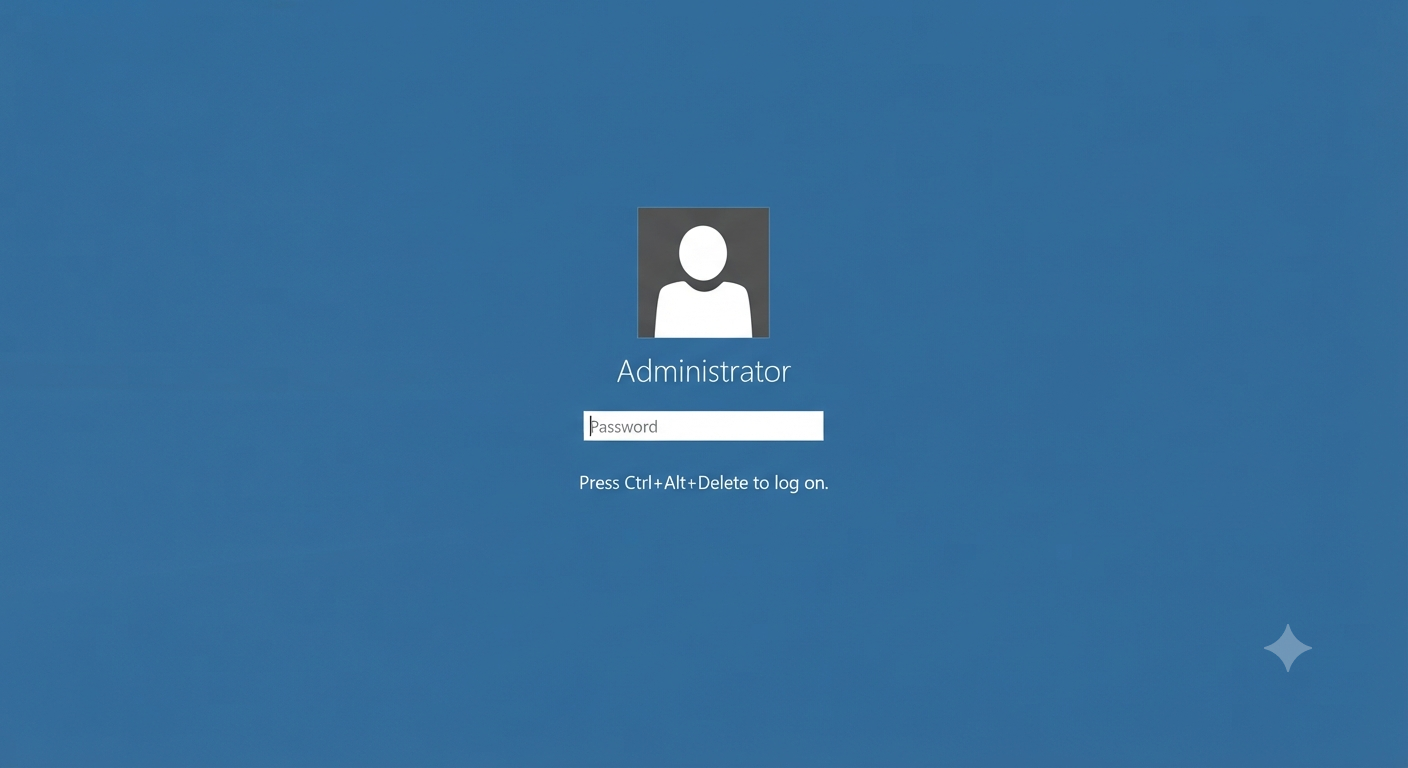
Press:
Ctrl + Alt + Delete
Enter the Administrator password.
The desktop and Server Manager will load automatically.
Configure Server Manager
Server Manager launches automatically after login.
From here you can:
- Add roles and features
- Configure networking
- Manage storage
- Install Hyper-V
- Configure Active Directory
- Monitor server health
Server Manager serves as the central administration console.
Configure Network Settings
Assign a static IP address to the server.
To do this:
- Open Network and Sharing Center.
- Select Change adapter settings.
- Open the Ethernet adapter properties.
- Configure IPv4 settings.
Specify:
- Static IP address
- Subnet mask
- Default gateway
- Preferred DNS server
Static addressing is recommended for nearly all server deployments.
Install Windows Updates
Although Windows Server 2012 R2 has reached the end of mainstream support, install all available updates applicable to your environment before placing the server into service.
Updates improve:
- Security
- Stability
- Driver compatibility
- Performance
Restart the server if required.
Install Device Drivers
Verify that all hardware devices are functioning correctly.
Use Device Manager to check for missing drivers.
Install drivers for:
- Network adapters
- RAID controllers
- Storage controllers
- Graphics adapters (if needed)
Manufacturer-provided drivers often offer better performance than generic drivers.
Install Server Roles
Windows Server supports numerous roles.
Common examples include:
- Active Directory Domain Services
- DNS Server
- DHCP Server
- File and Storage Services
- Hyper-V
- IIS Web Server
- Remote Desktop Services
- Print and Document Services
Install only the roles required for your workload to reduce complexity and improve security.
Configure Storage
Use Server Manager or Disk Management to:
- Create data volumes
- Initialize new disks
- Configure Storage Spaces
- Assign drive letters
Organizing storage properly improves performance and simplifies future maintenance.
Enable Remote Management
Remote administration allows IT staff to manage the server without physical access.
Popular tools include:
- Remote Desktop
- Windows Admin Center
- PowerShell Remoting
- Remote Server Administration Tools (RSAT)
Enable only the services you need and secure them appropriately.
Configure Windows Firewall
Review the default firewall rules and allow only the necessary ports for installed server roles.
Proper firewall configuration significantly improves security.
Set Up Scheduled Backups
Regular backups protect against hardware failures, accidental deletion, and malware.
Windows Server Backup can be configured to perform automatic backups of:
- System state
- Entire server
- Selected volumes
- Shared folders
Periodically test your backup restoration process to ensure it works as expected.
Best Practices After Installation
After installing Windows Server 2012 R2, consider these recommendations:
- Use strong administrator passwords.
- Rename the default Administrator account if appropriate.
- Enable Windows Defender or other endpoint protection.
- Monitor server performance regularly.
- Document configuration changes.
- Remove unused roles and features.
- Create restore points or system backups before major changes.
These practices contribute to a secure and reliable server environment.
Common Installation Problems
Some administrators may encounter issues during setup.
Typical problems include:
Installation Media Won’t Boot
Verify that:
- The bootable USB was created correctly.
- BIOS or UEFI boot order is configured properly.
- Secure Boot settings are compatible with the installation media.
Storage Drive Not Detected
If the installer cannot detect your storage device:
- Load the correct storage controller or RAID driver.
- Verify RAID configuration in the BIOS.
Network Adapter Missing
Install the latest driver from the hardware manufacturer after Windows setup is complete.
Installation Freezes
Possible causes include:
- Faulty RAM
- Corrupted installation media
- Hard drive issues
- Incompatible hardware
Running hardware diagnostics can help identify the root cause.
Frequently Asked Questions
Is Windows Server 2012 R2 still supported?
Mainstream support has ended, and extended support has also concluded. Organizations using Windows Server 2012 R2 should review Microsoft’s current support lifecycle and consider upgrading to a supported version of Windows Server for ongoing security updates and technical support.
Should I install Server Core or Server with a GUI?
Server Core is recommended for experienced administrators who want better security and lower maintenance. Server with a GUI is often easier for beginners and environments that rely on graphical management tools.
Can I upgrade Windows Server 2012 R2 to a newer version?
Yes, depending on your current edition and Microsoft’s supported upgrade paths. However, many organizations choose to perform a clean installation and migrate workloads to ensure optimal performance and compatibility.
How much RAM should I allocate?
While the minimum requirement is relatively low, at least 8 GB of RAM is recommended for most production environments. Servers running virtualization, databases, or multiple roles may require substantially more memory.
Can I install Windows Server 2012 R2 on a virtual machine?
Yes. Windows Server 2012 R2 runs well on virtualization platforms such as Hyper-V, VMware Workstation, VMware ESXi, and Oracle VirtualBox, provided the virtual machine meets the operating system’s hardware requirements.
Conclusion
Windows Server 2012 R2 remains a capable operating system for organizations maintaining legacy infrastructure, test labs, or specialized applications. Its support for virtualization, centralized management, networking, and enterprise services made it one of Microsoft’s most successful server releases.