


How to Take and Edit Screenshots Using Snip & Sketch in Windows 10
Screenshots are one of the easiest ways to capture information displayed on your computer. Whether you’re documenting an error message, creating a tutorial, saving important information, or sharing something interesting with friends or coworkers, taking a screenshot is often faster than explaining it in words.
Windows 10 introduced Snip & Sketch, a modern screenshot utility designed to replace the older Snipping Tool. It provides several capture modes, quick keyboard shortcuts, and basic editing features that make taking and annotating screenshots simple and efficient.
In this guide, you’ll learn how to use Snip & Sketch in Windows 10, explore its editing tools, discover useful keyboard shortcuts, and troubleshoot common issues.
What Is Snip & Sketch?
Snip & Sketch is a built-in Windows 10 application that allows you to capture screenshots and make quick edits before saving or sharing them.
With Snip & Sketch, you can:
- Capture the entire screen
- Select a custom area
- Capture a single application window
- Delay screenshots
- Annotate images
- Crop screenshots
- Share captured images
The application is lightweight, easy to use, and doesn’t require any third-party software.
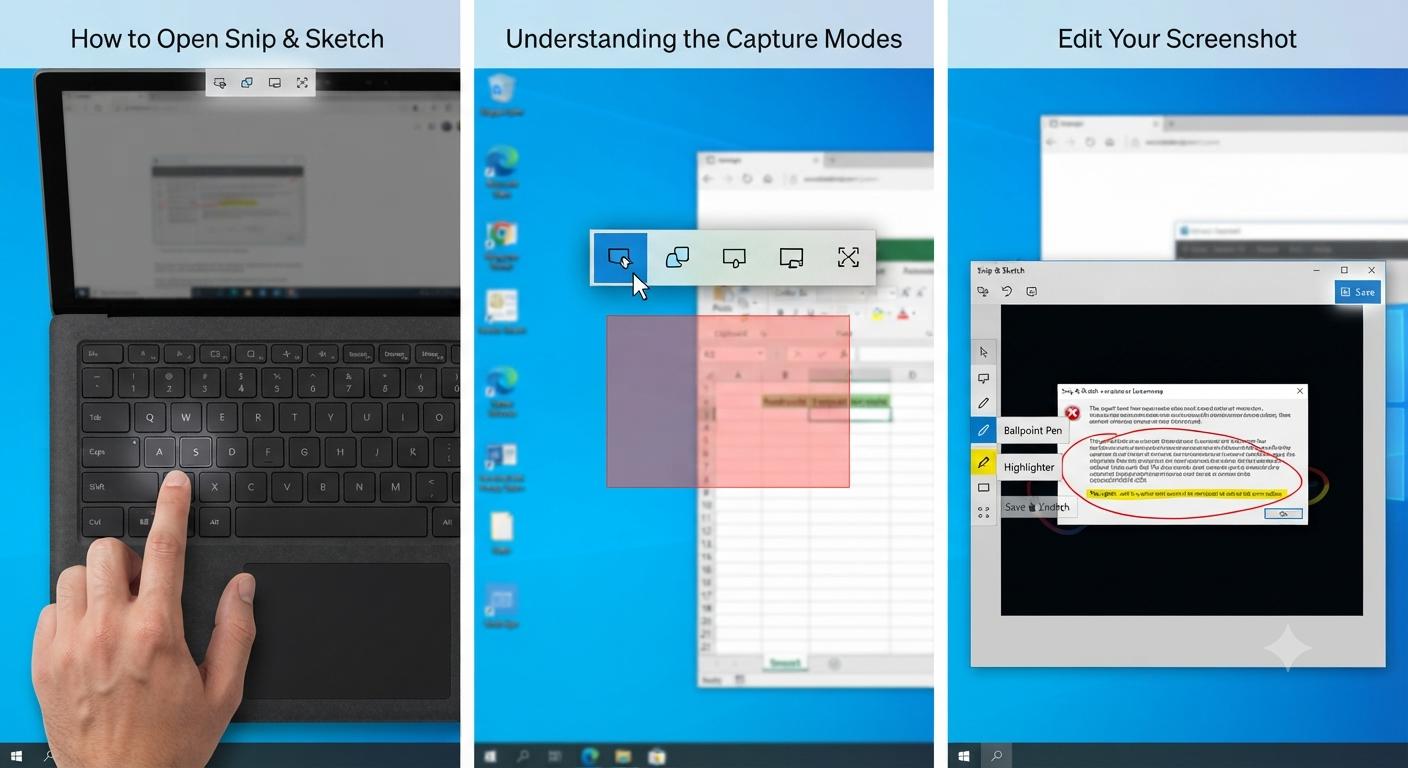
How to Open Snip & Sketch
There are several ways to launch Snip & Sketch.
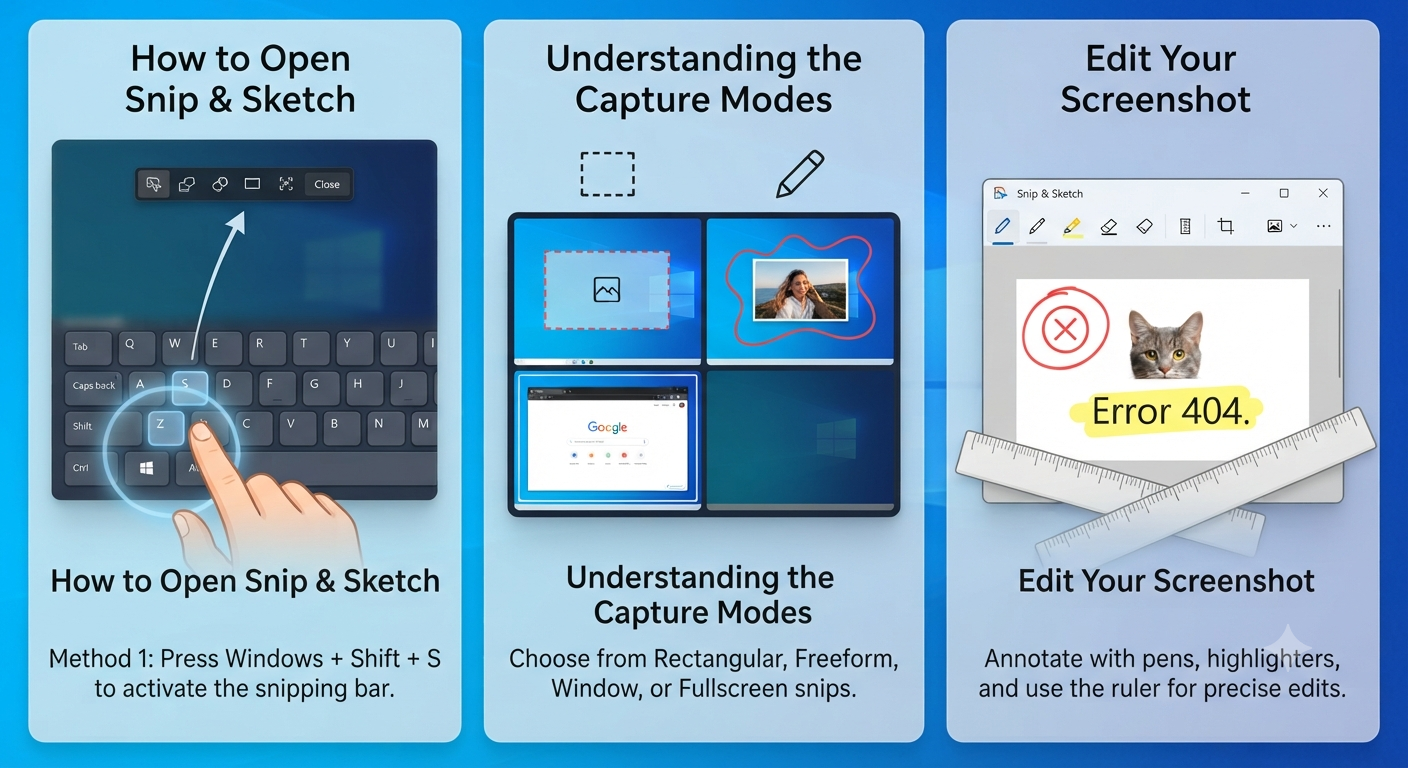
Method 1: Using the Keyboard Shortcut
Press:
Windows + Shift + SThe screen dims, and the snipping toolbar appears at the top of the display.
This is the quickest method and works from almost anywhere in Windows.
Method 2: Using the Start Menu
- Click the Start button.
- Type:
Snip & Sketch- Open the application.
Method 3: Using Action Center
Open the Action Center by clicking the notification icon on the taskbar.
Select:
Screen Snip
This immediately opens the capture toolbar.
Image: Snip & Sketch toolbar.
Understanding the Capture Modes
Snip & Sketch offers four screenshot options.
Rectangular Snip
This is the most commonly used mode.
Simply click and drag to select the area you want to capture.
It’s ideal for:
- Error messages
- Application windows
- Sections of webpages
- Images
Freeform Snip
Freeform mode lets you draw any shape around the area you want to capture.
It’s useful for selecting irregular objects or highlighting specific elements.
Window Snip
This option captures an entire application window.
Simply click the desired window, and Snip & Sketch captures it automatically.
Fullscreen Snip
Fullscreen mode captures everything displayed across your monitor.
If you’re using multiple monitors, all connected displays may be included in the screenshot, depending on your configuration.
How to Take a Screenshot
Capturing a screenshot takes only a few steps.
- Press:
Windows + Shift + S- Choose the desired snipping mode.
- Select the area to capture.
The screenshot is automatically copied to your clipboard.
A notification appears in the lower-right corner.
Click the notification to open the screenshot in Snip & Sketch for editing.
Image: Screenshot notification.
Edit Your Screenshot
Once the image opens in Snip & Sketch, several editing tools become available.
Ballpoint Pen
Draw freehand notes directly on the screenshot.
You can choose different colors and pen thicknesses.
Pencil
Provides a softer drawing effect that resembles a traditional pencil.
Useful for annotations and rough sketches.
Highlighter
Highlight important text or interface elements.
This tool is especially useful when creating tutorials or documentation.
Eraser
Remove unwanted annotations without affecting the original screenshot.
Touch Writing
If you’re using a touchscreen device, Touch Writing allows natural drawing using a stylus or finger.
Crop the Screenshot
If your capture includes unnecessary content:
- Click the Crop button.
- Adjust the cropping handles.
- Apply the crop.
Cropping helps focus attention on the important parts of the image.
Use the Ruler and Protractor
Snip & Sketch includes digital measuring tools.
Ruler
The ruler helps draw straight lines.
You can rotate it to different angles before drawing.
Protractor
The protractor is useful for drawing curved lines or measuring angles.
These tools are particularly helpful for educational content or technical illustrations.
Save the Screenshot
After editing:
- Click the Save button.
- Choose a folder.
- Select a filename.
- Save the image.
PNG is the default format because it preserves image quality.
You can also save screenshots as:
- JPG
- GIF (depending on the version)
- Other supported formats
Copy the Screenshot
Instead of saving immediately, you can copy the edited screenshot.
Click:
Copy
Then paste it into:
- Microsoft Word
- Outlook
- PowerPoint
- Teams
- Paint
- Image editors
This is convenient when you need to insert screenshots into documents quickly.
Share Screenshots
The Share feature allows you to send screenshots directly to compatible applications.
Depending on your Windows configuration, you may be able to share via:
- Microsoft Teams
- Nearby Sharing
- Other installed apps
This can simplify collaboration and reduce the number of manual steps.
Delay a Screenshot
Sometimes you need to capture menus or pop-up windows that disappear when you click elsewhere.
Snip & Sketch includes a delay option.
To use it:
- Open Snip & Sketch.
- Click the New button.
- Choose a delay of several seconds.
- Prepare the screen.
- Capture the desired area when the timer expires.
This feature is useful for capturing:
- Context menus
- Tooltips
- Drop-down lists
- Temporary notifications
Assign the Print Screen Key
Windows allows you to launch Snip & Sketch using the Print Screen key.
To enable it:
- Open Settings.
- Go to:
Ease of Access > Keyboard
- Enable:
Use the PrtScn button to open screen snipping
Now pressing Print Screen opens the Snip & Sketch toolbar instead of taking a traditional screenshot.
Where Are Screenshots Saved?
Screenshots taken using Windows + Shift + S are initially copied to the clipboard.
They are only saved permanently after you choose Save.
If you use the traditional Print Screen or Windows + Print Screen shortcuts, Windows saves screenshots automatically in:
Pictures\ScreenshotsUnderstanding the difference helps prevent accidentally losing captures.
Keyboard Shortcuts for Faster Screenshots
Learning a few shortcuts can make screen capturing much more efficient.
| Shortcut | Function |
|---|---|
| Windows + Shift + S | Open Snip & Sketch toolbar |
| Print Screen | Capture screen (behavior depends on settings) |
| Windows + Print Screen | Save full-screen screenshot automatically |
| Alt + Print Screen | Capture the active window |
| Ctrl + C | Copy screenshot |
| Ctrl + V | Paste screenshot |
Using these shortcuts can significantly speed up your workflow.
Common Problems and Solutions
Snip & Sketch Doesn’t Open
If the application doesn’t launch:
- Restart your computer.
- Install the latest Windows updates.
- Reset the app through Settings > Apps.
- Ensure the keyboard shortcut is not being intercepted by another application.
Notification Doesn’t Appear
If the screenshot notification is missing:
- Check Windows notification settings.
- Make sure Focus Assist is not blocking notifications.
- Open Snip & Sketch manually and paste the screenshot if necessary.
Print Screen Doesn’t Launch Snip & Sketch
Verify that the Print Screen shortcut has been enabled in the keyboard settings.
You may also need to restart Windows after changing the setting.
Screenshots Are Not Saving
Ensure you click Save after editing.
Also verify that you have permission to write to the selected folder and that sufficient storage space is available.
Tips for Better Screenshots
To create clear and professional screenshots:
- Close unnecessary applications before capturing.
- Remove sensitive information from the screen.
- Crop away unused areas.
- Use the highlighter sparingly to emphasize key details.
- Keep annotations simple and readable.
- Save images as PNG for the best quality.
These practices make screenshots easier to understand and share.
Snip & Sketch vs. Snipping Tool
Both applications capture screenshots, but Snip & Sketch offers several improvements.
| Feature | Snip & Sketch | Snipping Tool |
|---|---|---|
| Modern interface | Yes | No |
| Quick keyboard shortcut | Yes | Limited |
| Built-in annotation | Yes | Basic |
| Delay capture | Yes | Yes |
| Windows 10 integration | Excellent | Limited |
Although Microsoft has introduced an updated Snipping Tool in newer versions of Windows, Snip & Sketch remains a useful utility for many Windows 10 users.
Frequently Asked Questions
Is Snip & Sketch free?
Yes. Snip & Sketch is included with Windows 10 at no additional cost.
Can I edit screenshots after capturing them?
Yes. You can annotate, highlight, crop, erase, and draw directly on screenshots using the built-in editing tools.
Does Snip & Sketch record videos?
No. Snip & Sketch is designed only for capturing and editing still images. If you need screen recording, consider using the Xbox Game Bar or other recording software.
Can I use Snip & Sketch with multiple monitors?
Yes. You can capture content from any connected display. Fullscreen captures may include all monitors, while rectangular and window snips allow you to select a specific area or application.
Is Snip & Sketch still available in Windows 11?
Windows 11 introduces a redesigned Snipping Tool that combines features from both the classic Snipping Tool and Snip & Sketch. While the interface has changed, many of the core screenshot and annotation capabilities remain available.
Conclusion
Snip & Sketch is a powerful yet easy-to-use screenshot tool that simplifies capturing, editing, and sharing images in Windows 10. Whether you’re documenting technical issues, creating tutorials, collaborating with coworkers, or saving important information, its built-in annotation and cropping features make it a practical choice for everyday tasks.