Controlling Row and Column Limits in Excel Worksheets

Managing the data view in Excel can sometimes be overwhelming, especially when dealing with large datasets. Limiting the number of rows and columns in an Excel worksheet can help you focus on specific data, enhance usability, and prevent unintended scrolling or data entry in unwanted areas. This guide will show you how to limit rows and columns in an Excel worksheet effectively.
Why Limit Rows and Columns in Excel?
- Improve Readability: Reducing the visible data area helps users focus on specific data.
- Prevent Errors: Limiting rows and columns can prevent accidental data entry in unwanted areas.
- Enhance Usability: Streamlining the worksheet makes navigation simpler and more intuitive for users.
Step-by-Step Guide to Limiting Rows and Columns in Excel
Below are methods you can use to limit rows and columns in Excel:
1. Hiding Rows and Columns

The simplest way to limit the number of rows and columns is to hide the ones you don’t need.
Step-by-Step Guide:
Hiding Rows:
- Select the Rows You Want to Hide:
- Click on the row number on the left side of the Excel window, hold and drag down to select multiple rows.
- Right-Click and Choose ‘Hide’:
- Right-click the selected rows and click on “Hide.”
Hiding Columns:
- Select the Columns You Want to Hide:
- Click on the column letter at the top of the Excel window, hold and drag to select multiple columns.
- Right-Click and Choose ‘Hide’:
- Right-click the selected columns and click on “Hide.”
By hiding rows and columns, you effectively limit the visible area of your worksheet without deleting any data.
2. Using Scroll Area to Limit Rows and Columns

Another effective method is to set the scroll area of the worksheet. This restricts the movement within the specified range, effectively limiting rows and columns.
Step-by-Step Guide:
- Open Excel and Access the Developer Tab:
- If the Developer tab is not visible, enable it by going to “File” > “Options” > “Customize Ribbon” and checking “Developer.”
- Click on ‘Properties’ in the Developer Tab:
- In the Developer tab, click on “Properties.”
- Set the Scroll Area:
- In the Properties window, locate the “ScrollArea” field and enter the range you want to restrict (e.g.,
A1:F20).
- In the Properties window, locate the “ScrollArea” field and enter the range you want to restrict (e.g.,
This method limits scrolling to the specified range, keeping the focus within the desired area of the worksheet.
3. Protecting the Worksheet to Restrict Rows and Columns

You can also protect the worksheet to prevent changes outside of a specific range.
Step-by-Step Guide:
- Select the Range You Want to Keep Editable:
- Highlight the range of cells that you want to keep editable.
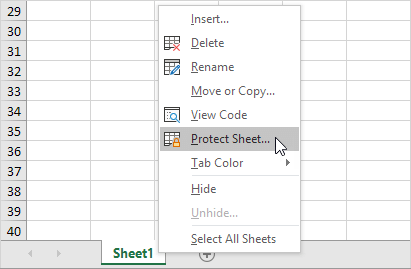
- Go to the ‘Review’ Tab and Click on ‘Protect Sheet’:
- In the Review tab, click on “Protect Sheet.” A dialog box will appear with options to customize the protection settings.
- Adjust Permissions and Click ‘OK’:
- Set permissions for the actions users can perform on the protected sheet, such as selecting locked cells, and click “OK.”
Protecting the sheet helps prevent any alterations outside the designated editable range, thereby limiting the rows and columns effectively.
4. Using VBA to Limit Rows and Columns

If you are comfortable with macros, VBA (Visual Basic for Applications) provides a powerful way to limit rows and columns.
Step-by-Step Guide:
- Open the VBA Editor:
- Press
ALT + F11to open the VBA Editor.
- Press
- Insert a New Module:
- Click on “Insert” > “Module” to add a new module.
- Enter the VBA Code:
- Copy and paste the following code to limit rows and columns:
vbaSub LimitRowsColumns()
ActiveSheet.ScrollArea = "A1:F20"
End Sub
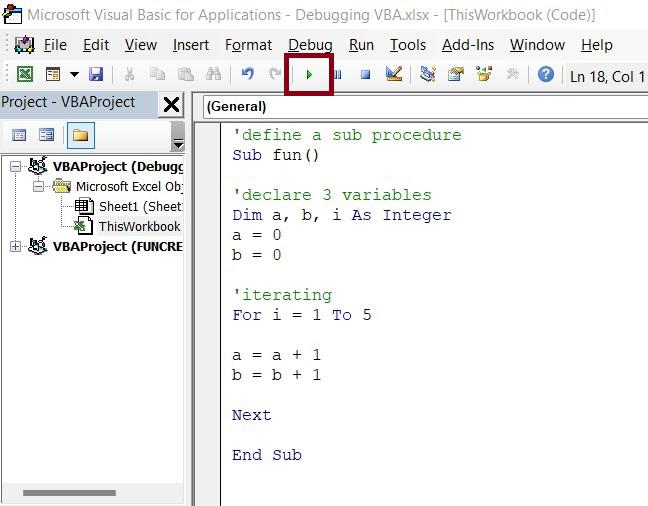
- Run the Macro:
- Press
F5to run the macro. This will restrict the scroll area to the range specified in the code (A1:F20).
- Press
Using VBA allows for dynamic control over the visible area of your worksheet, making it a versatile method for limiting rows and columns.
Conclusion
Limiting rows and columns in an Excel worksheet can greatly enhance the user experience by making the data easier to navigate and reducing the risk of errors. Whether you choose to hide rows and columns, set a scroll area, protect your sheet, or use VBA, these methods provide you with the flexibility to tailor your worksheet to your needs. Experiment with these techniques to find the best fit for your Excel projects!
